
Have you ever needed to make part of an image transparent? Whatever the case, it’s not as difficult as you think.
This article will show you how to make part of an image transparent easily and quickly using two simple online tools. Ready to get started? Let’s begin!
Table of Contents
Method #1: Make Part of an Image Transparent Using Photopea
Photopea is a powerful online photo editor. It has a very similar interface to Photoshop, so if you have experience with Photoshop, you can easily get started with it. The following steps will show you how to make a certain selection of an image transparent in Photopea:
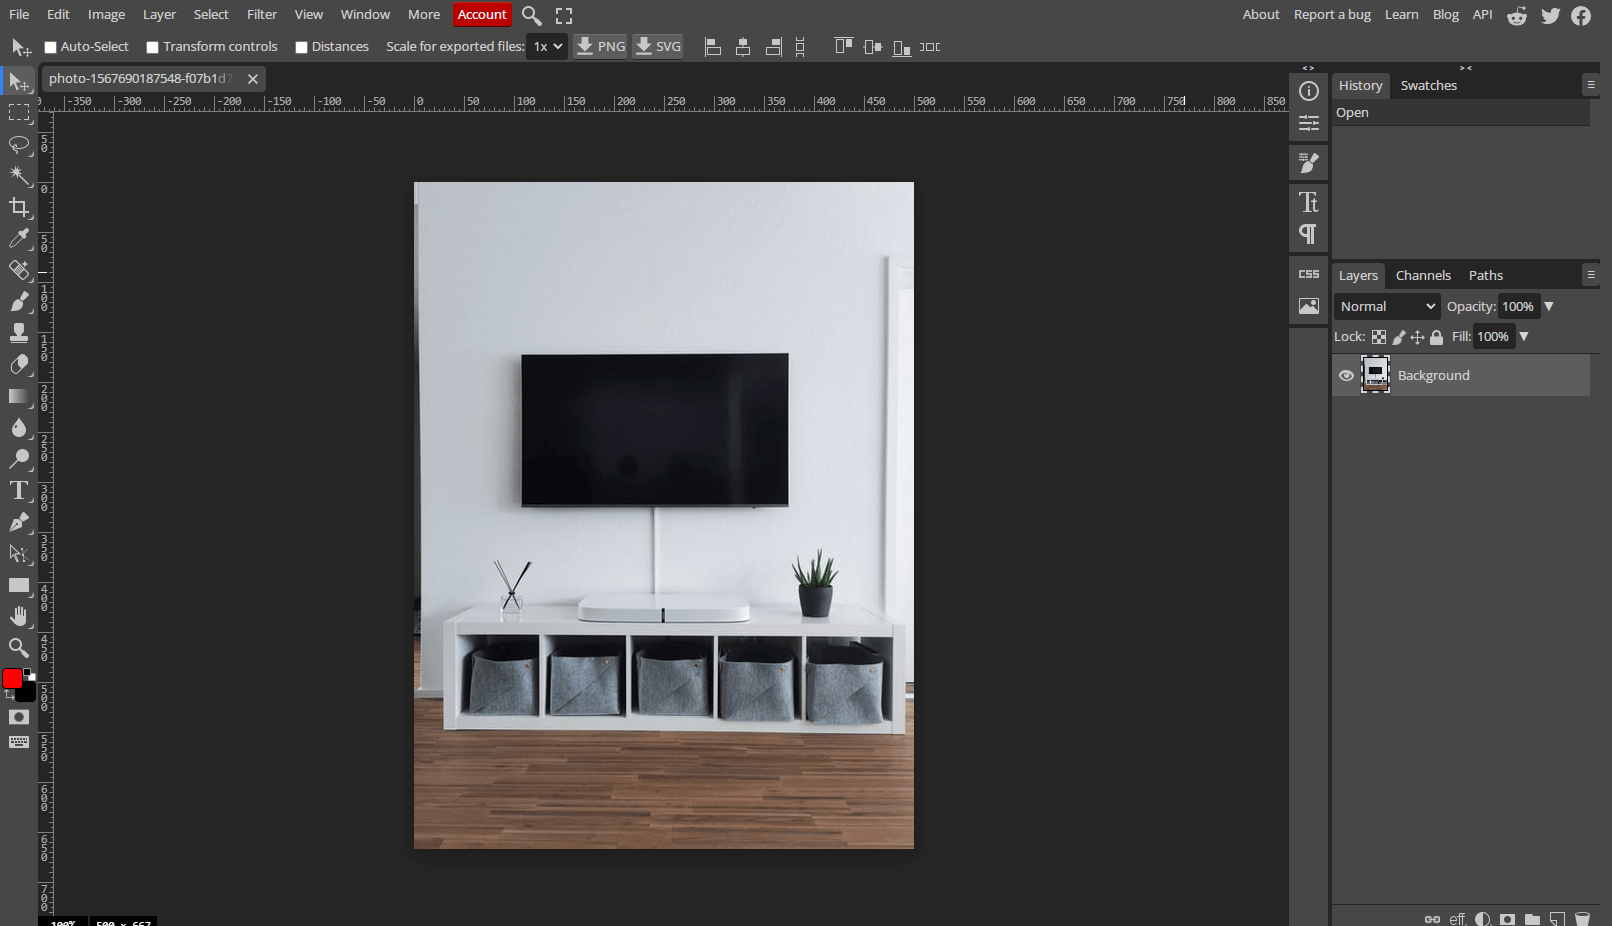
- Open Photopea.com, and upload the image that you want to edit.
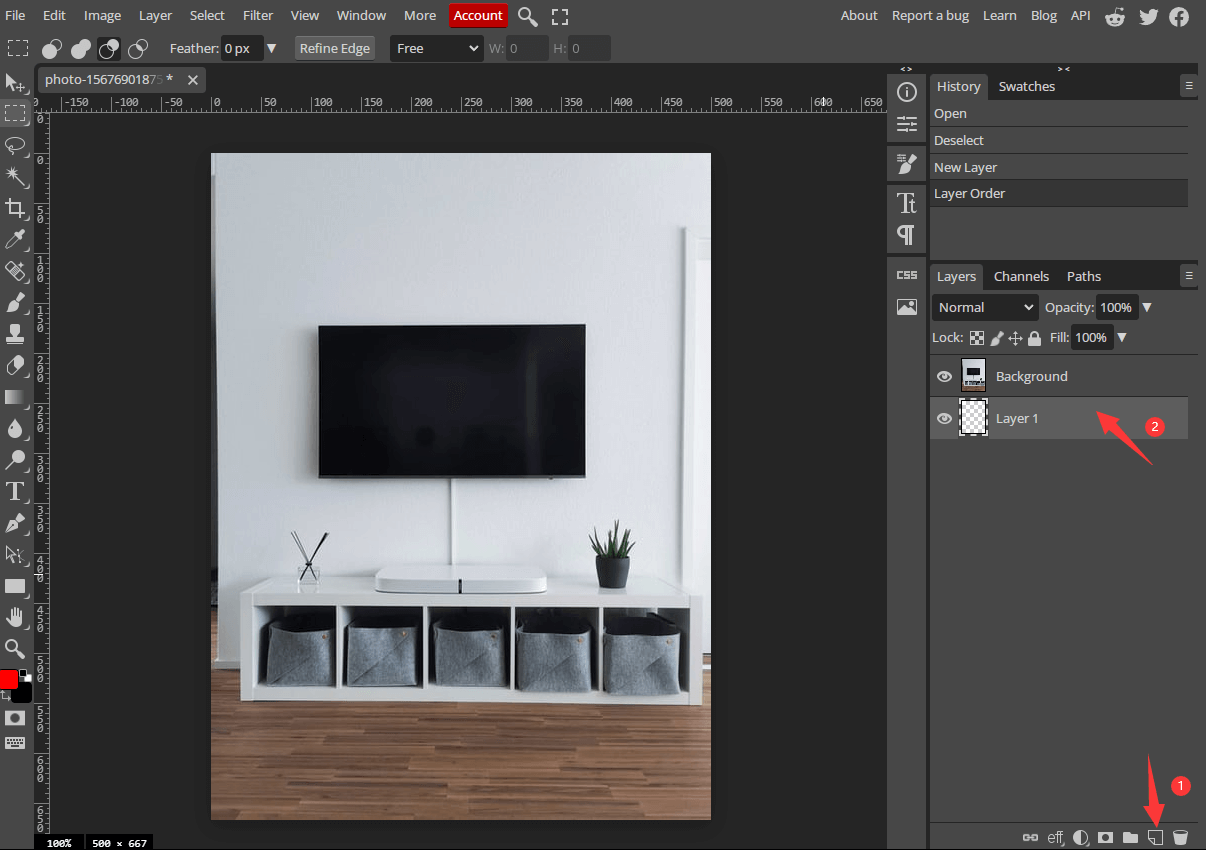
- Click the Add Layer Mask icon to add a new layer. Drag the new layer below your image layer.
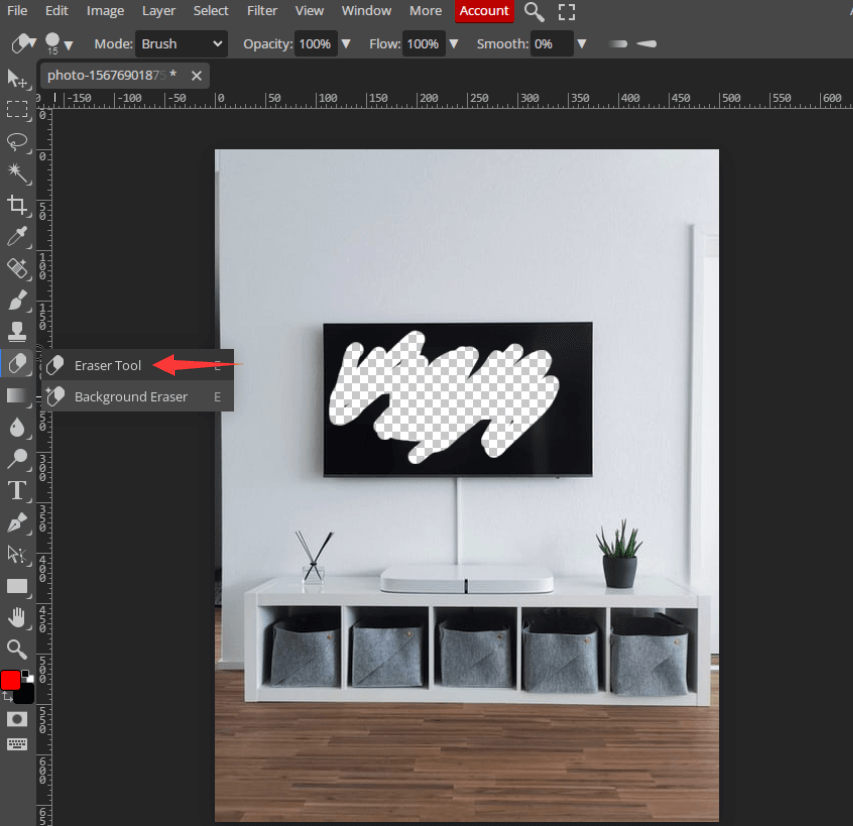
- Click the Eraser Brush tool, and paint over the area you wish to remove. It’s just that simple.
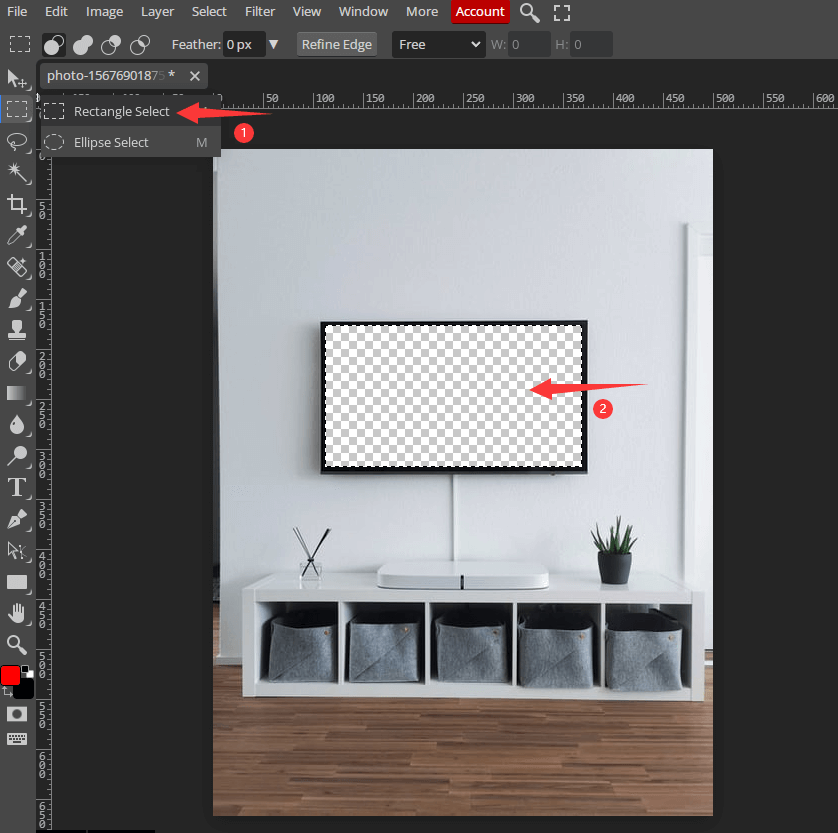
- Aside from the Eraser Brush tool, you can also use select tools. For example, you can use the Rectangular Select tool to select the part you don’t want, and then press Delete to make the selection area transparent right away.
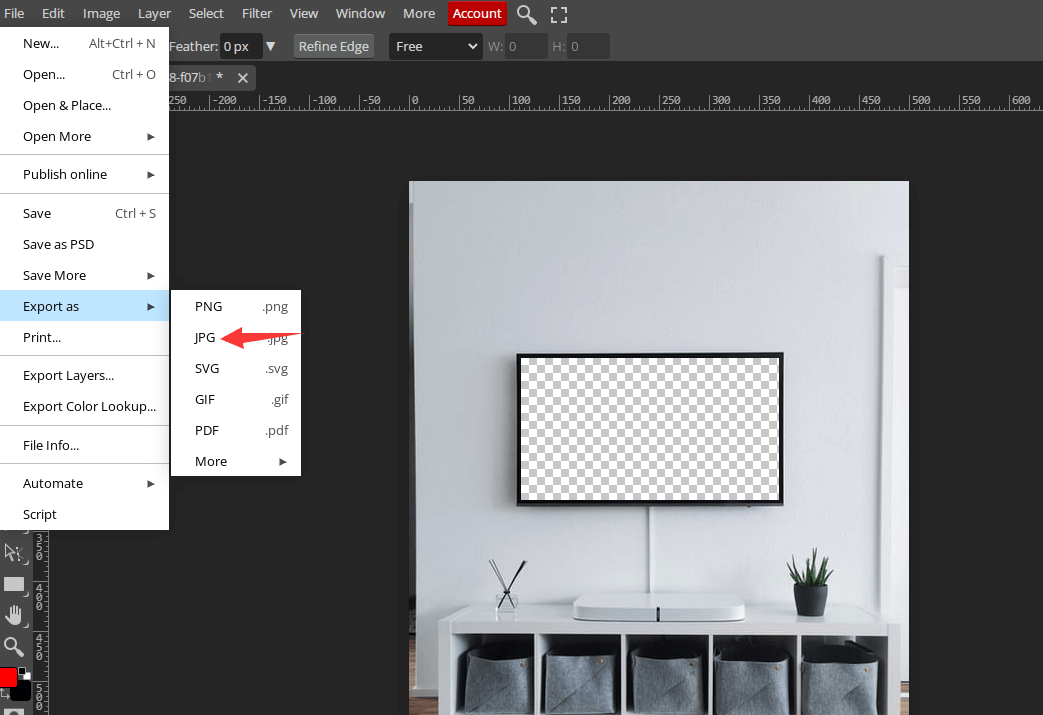
- When you’re satisfied with your image, export your image file as a PNG which accepts transparency.
Method #2: Make Part of an Image Transparent Using Fotor
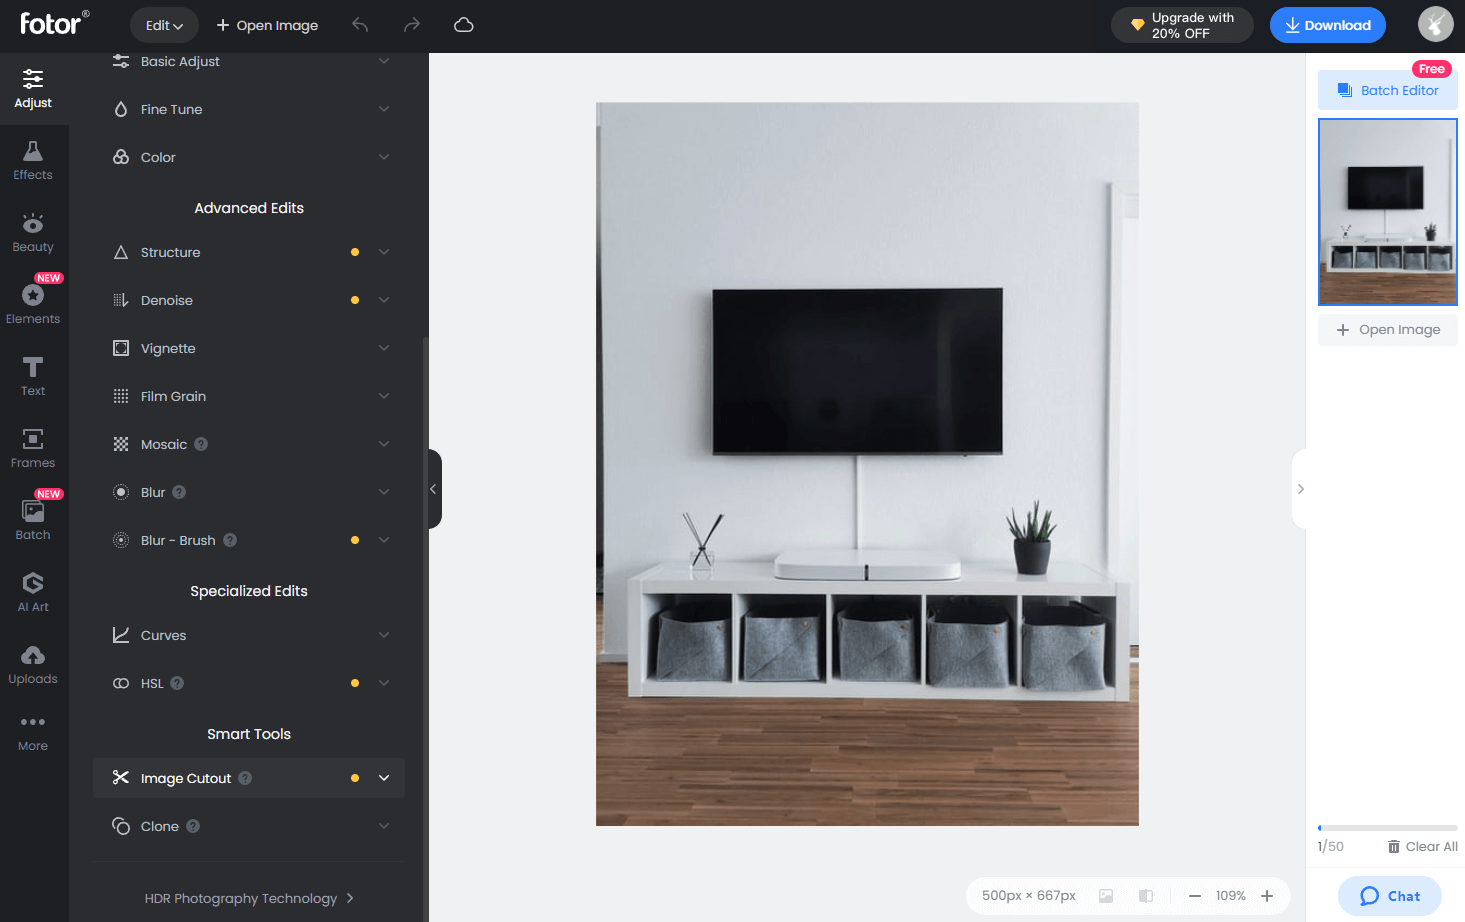
Fotor is another free photo editor online. Compared to Photopea, its interface is more user-friendly. You can use Fotor’s Image Cutout tool to quickly and easily make a selection transparent on your image. Here’s how you can do it:
- Open Fotor.com, then upload or drag and drop your image for partial transparency.
- Click the Image Cutout tool, mark the area you want to make transparent using the Remove Brush, and mark the area you want to remain using the Keep Bush.
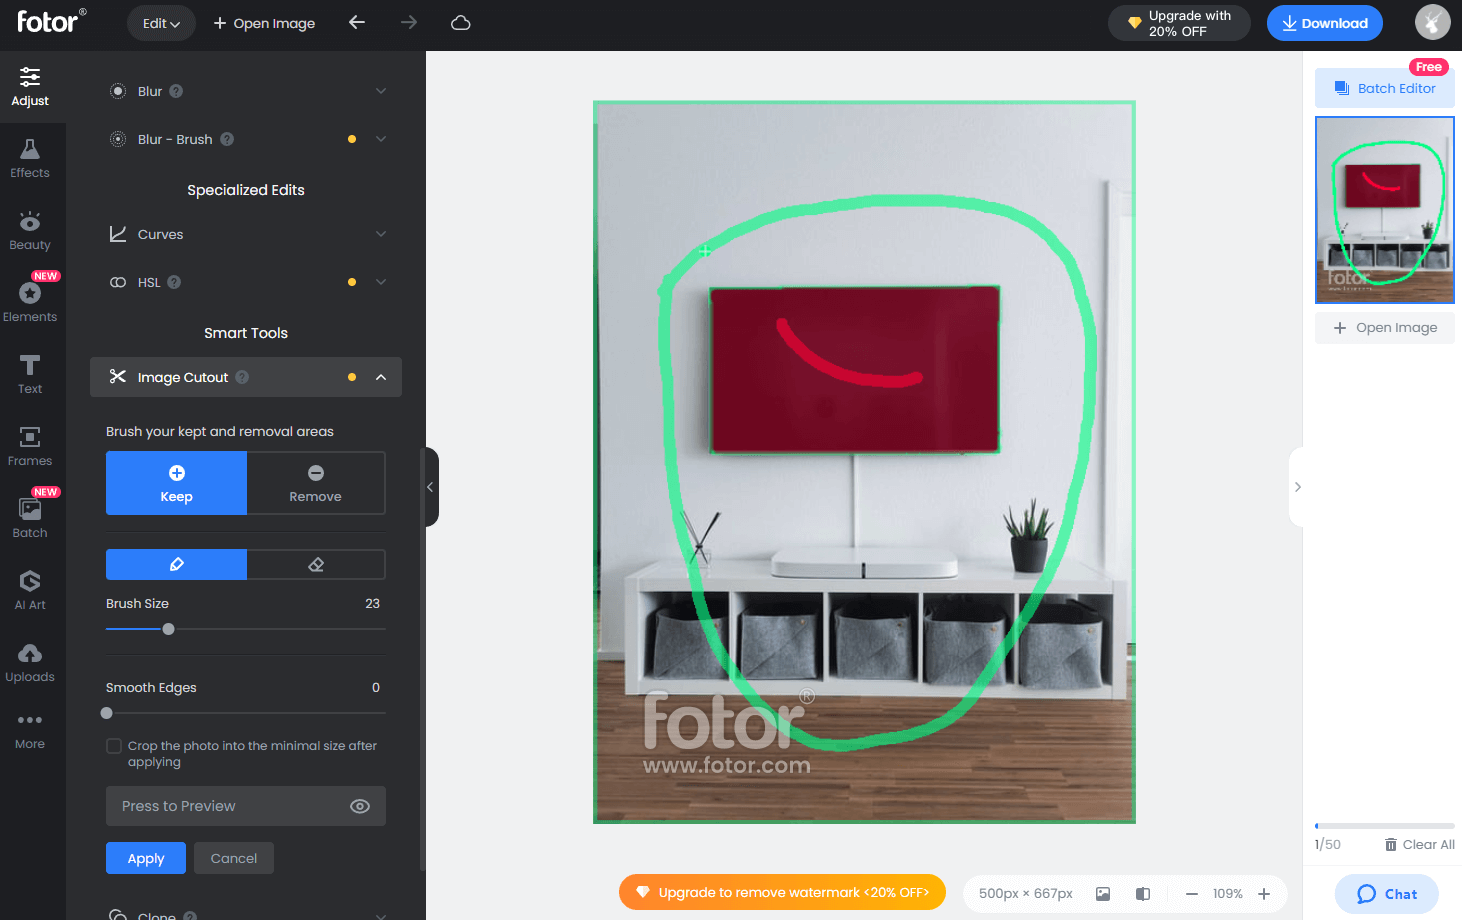
- You can adjust the brush size, and zoom in or zoom out your image to get more accurate results. Once done, click the Apply button and Fotor will automatically start making the selected parts of the image transparent for you.
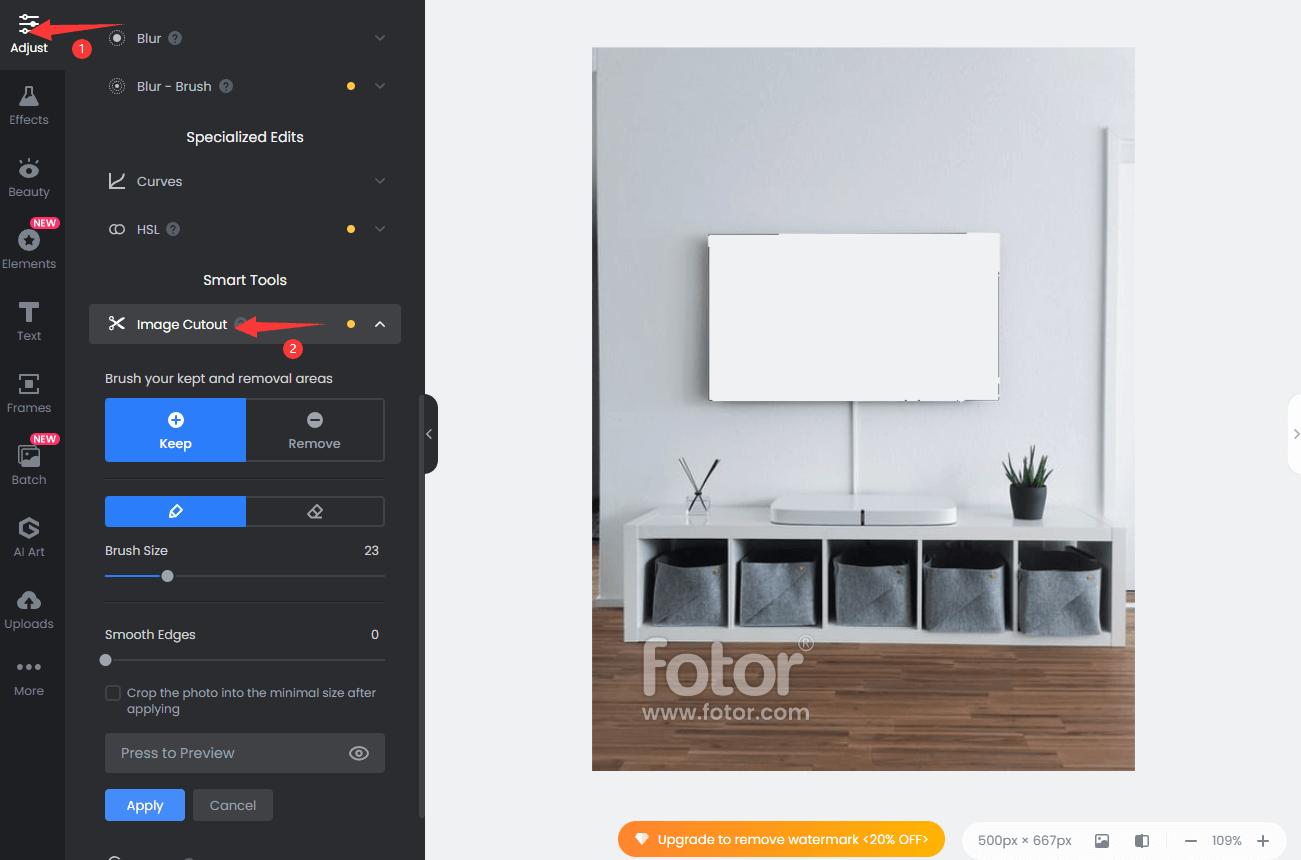
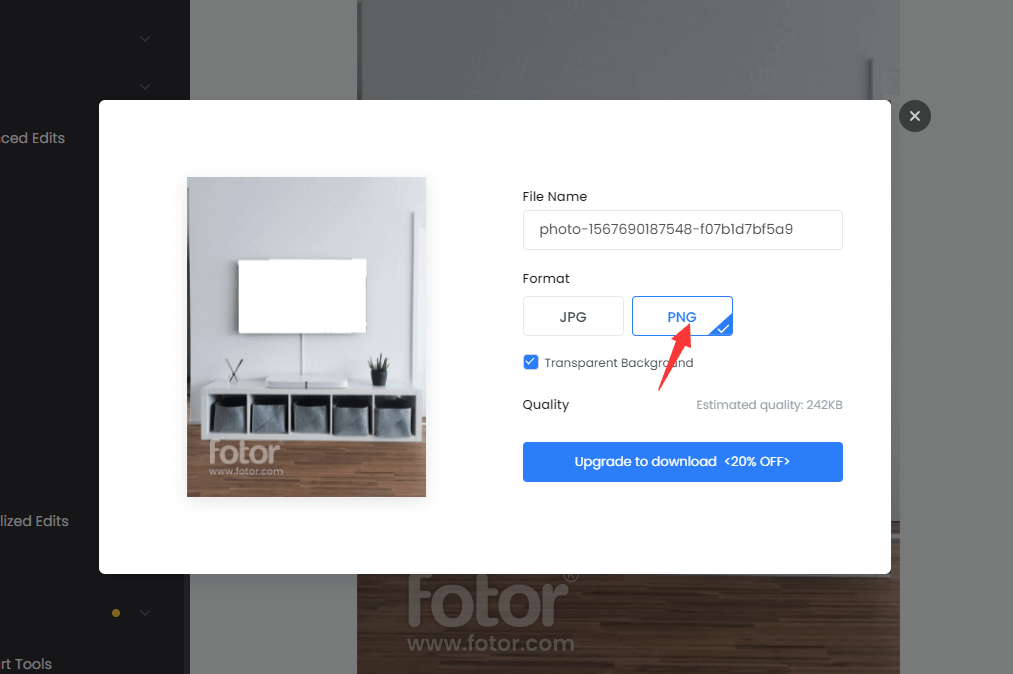
- That’s it. You have now successfully made part of an image transparent. Click the Download button to save your image to your computer. Ensure that your image is saved as a PNG with transparency.
Wrapping Up
Well, these are 2 simple online tools that you can use to make part of an image transparent quickly and effortlessly. Thanks for reading this article and I hope you find it useful. Also, please feel free to ask me any questions in the comment section below.