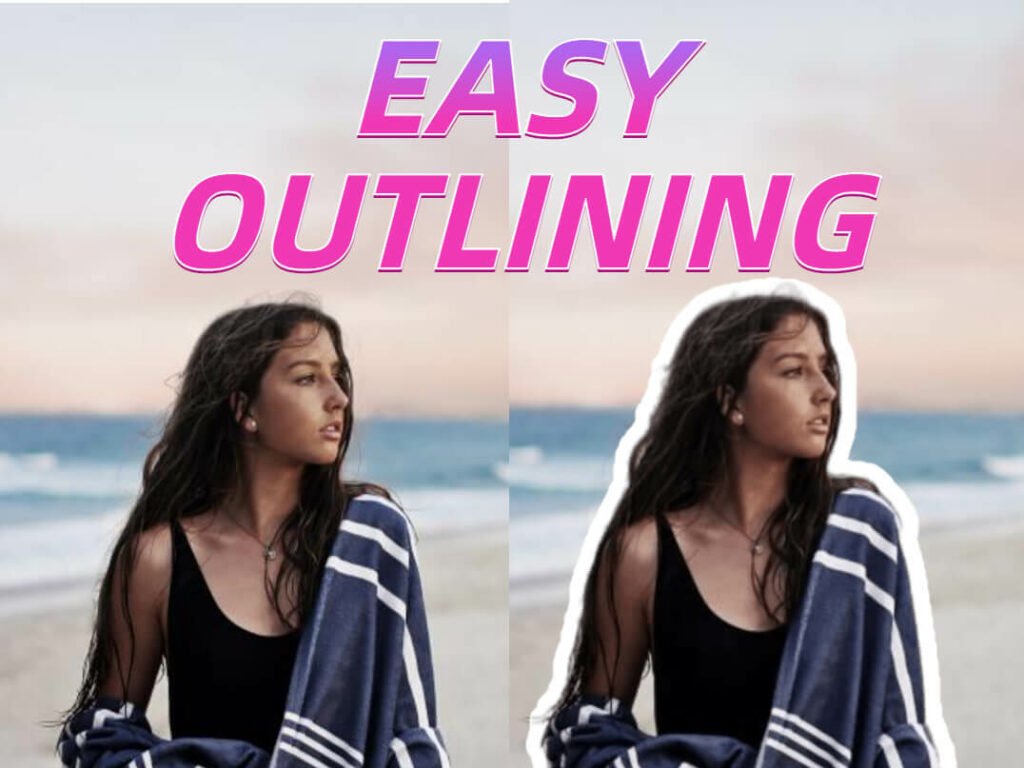
You’ve probably seen lots of YouTube video thumbnails with outlines around the image subject. Have you ever wondered how YouTubers create thumbnails like these?

Photoshop can be used to do so, but it can be a bit challenging and complicated if you’re not familiar with it.
So if you’re looking for an easy way to outline an image, then you’ve come to the right place. In this tutorial, we will show you how to outline an image easily and quickly using 2 simple, free online tools.
Whether you’re a novice or an expert, you’ll find this tutorial simple to follow. And you’re sure to be able to create outlines for any image you need after reading it.
Ok, let’s get started and learn how to outline an image without Photoshop.
You May Also Like: How To Outline Text in Google Docs
Table of Contents
Outline an Image With Free Online Tools
Step 1. Cut out your subject
The first step to outlining an image is to cut out your subject so that you can create an outline around it.
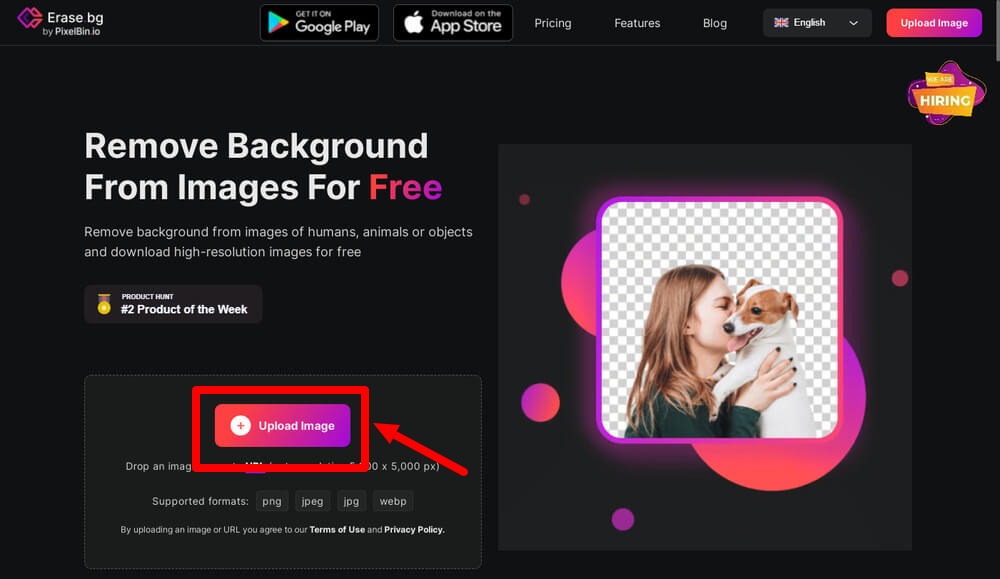
You can use a free online program called Erase.bg to quickly separate the subject of your image from its background for free.
Go to erase.bg, upload or drag & drop your image onto the page, and Erase.bg will remove the image background for you automatically.
The process is super fast, and you will get a clean, precise cutout in no time.
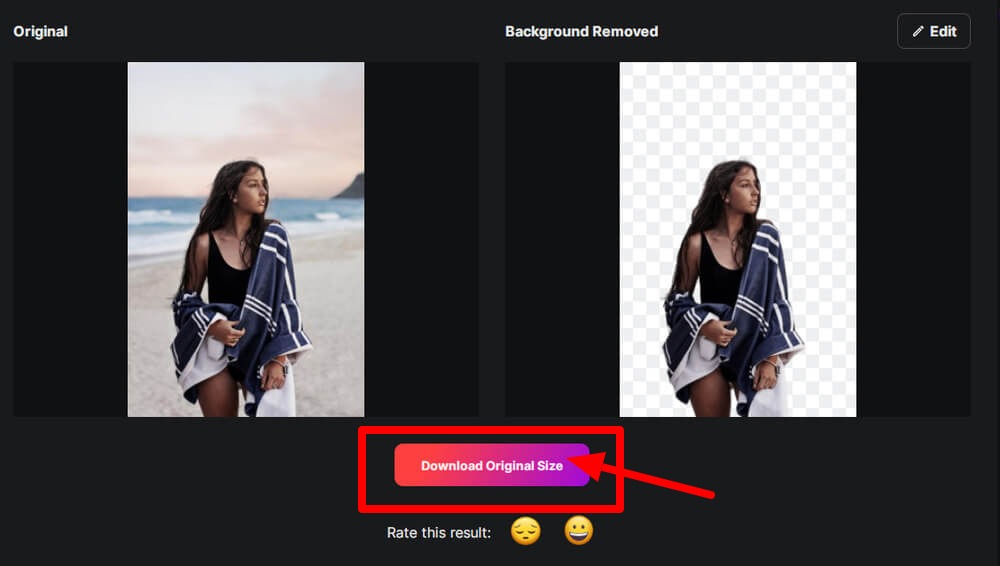
Then click ’Download Original Size’ to save your image in PNG format with a transparent background.
Step 2. Outline your subject
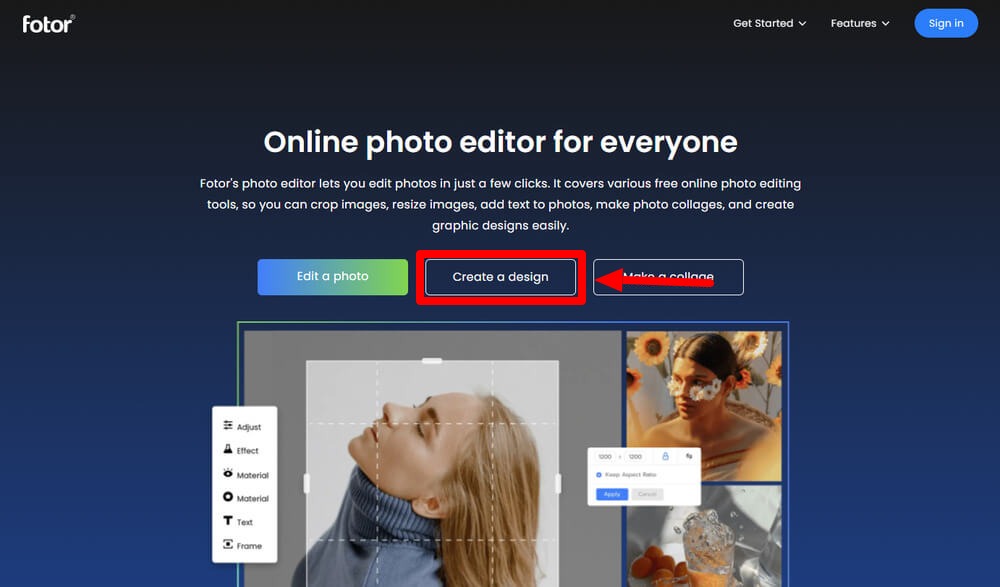
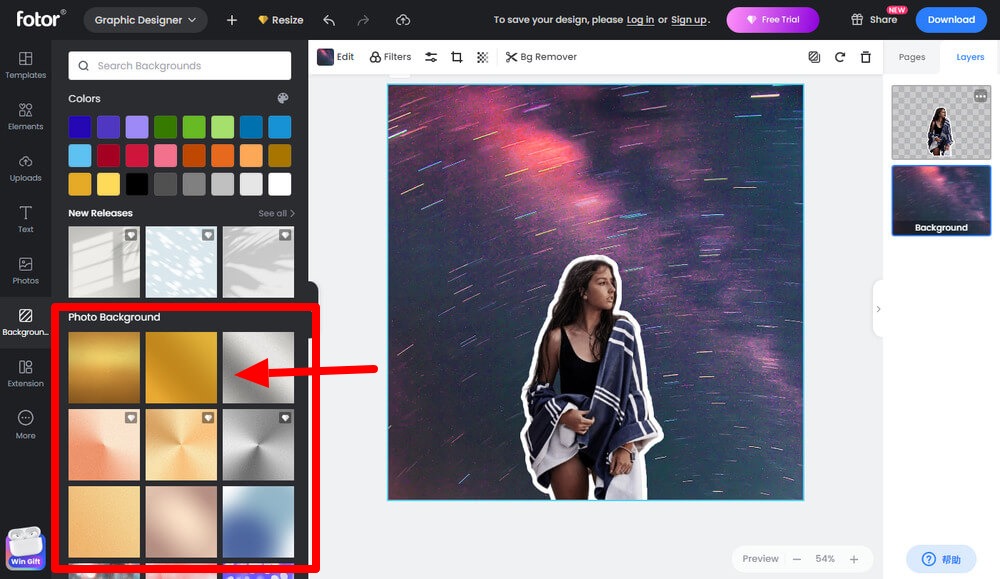
After you have extracted your image subject, upload it to Fotor.
Fotor is a free online photo editor that is perfect for anyone seeking quick and easy ways to edit and touch up images online.
Go to fotor.com, and click the ‘Create a design’ button on the homepage.
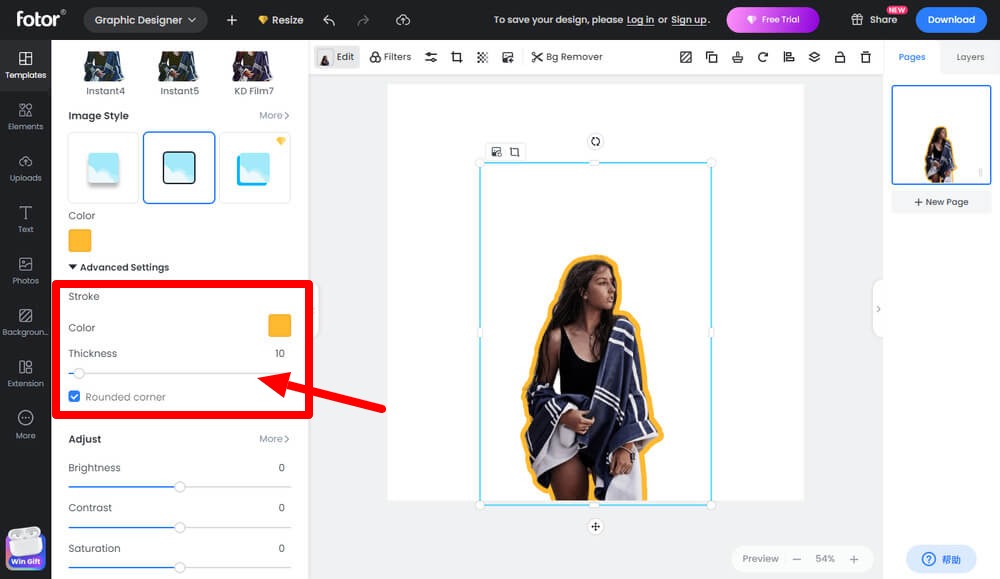
Drag & drop your image into the canvas, and click ‘Edit’ at the top menu. Click the second icon under the ‘Image Style’ tab. This will create a black outline on your image.
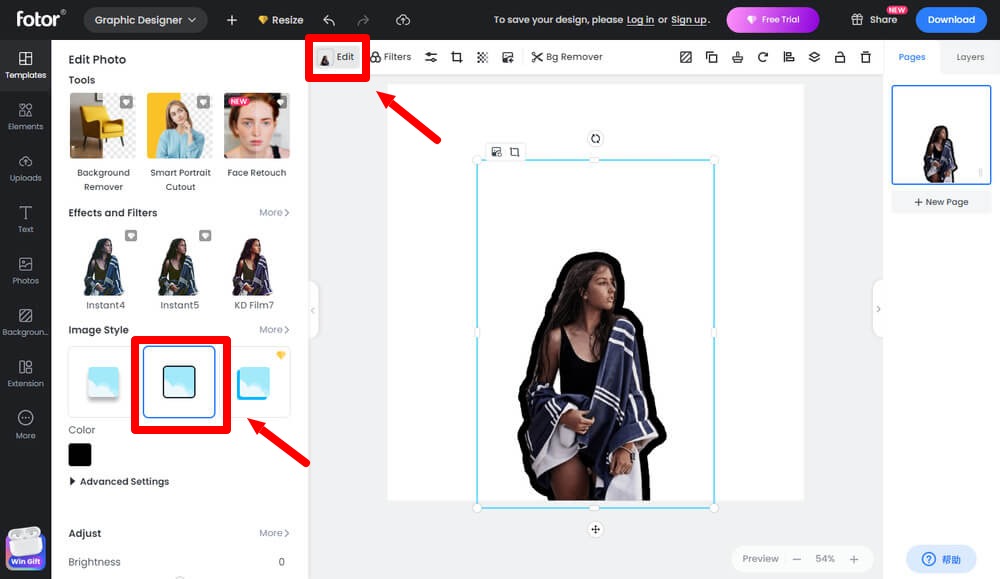
You can adjust the outline to your liking. Change the outline color to white, yellow, or any other color you like. You can also adjust the outline thickness by dragging the slider.
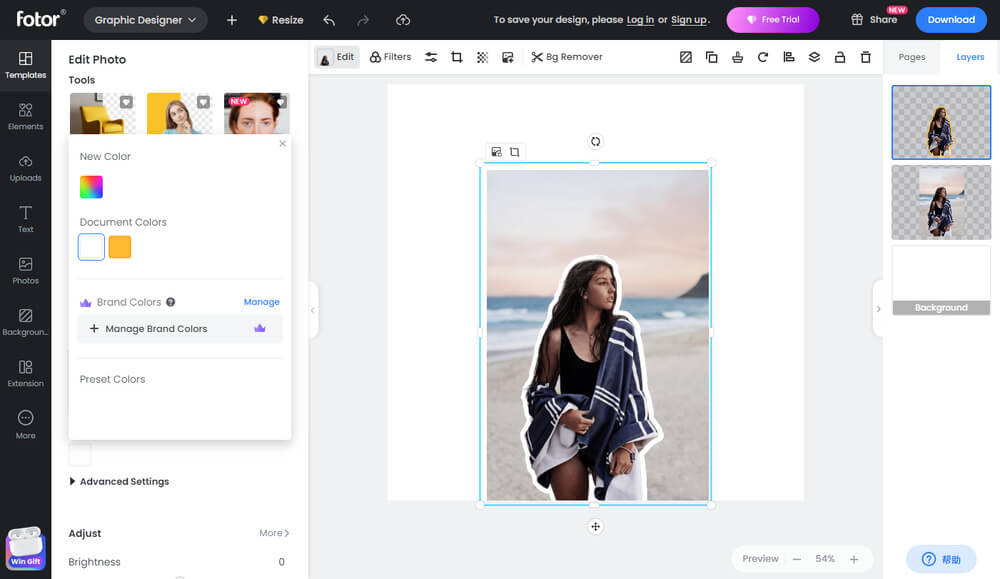
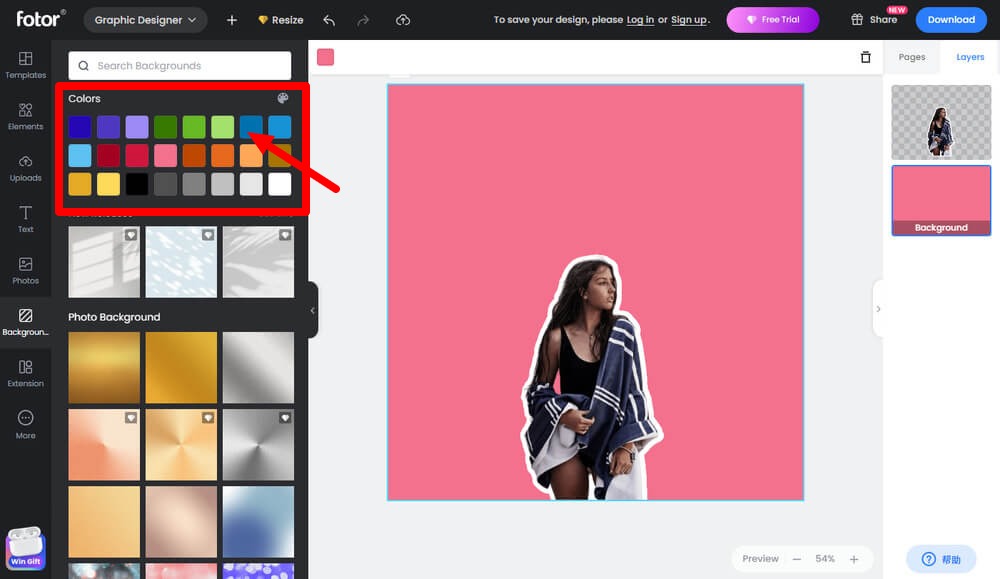
Now you’ve successfully outlined an image. If you want, you can add the original image back underneath it or try a different new background.
Step3. Save and download your outlined image
Once you’re happy with how everything looks, click on the “Download” button in the upper right-hand corner of the screen. From here, you can save your image as a JPG, PNG or PDF file. That’s all there is to it!
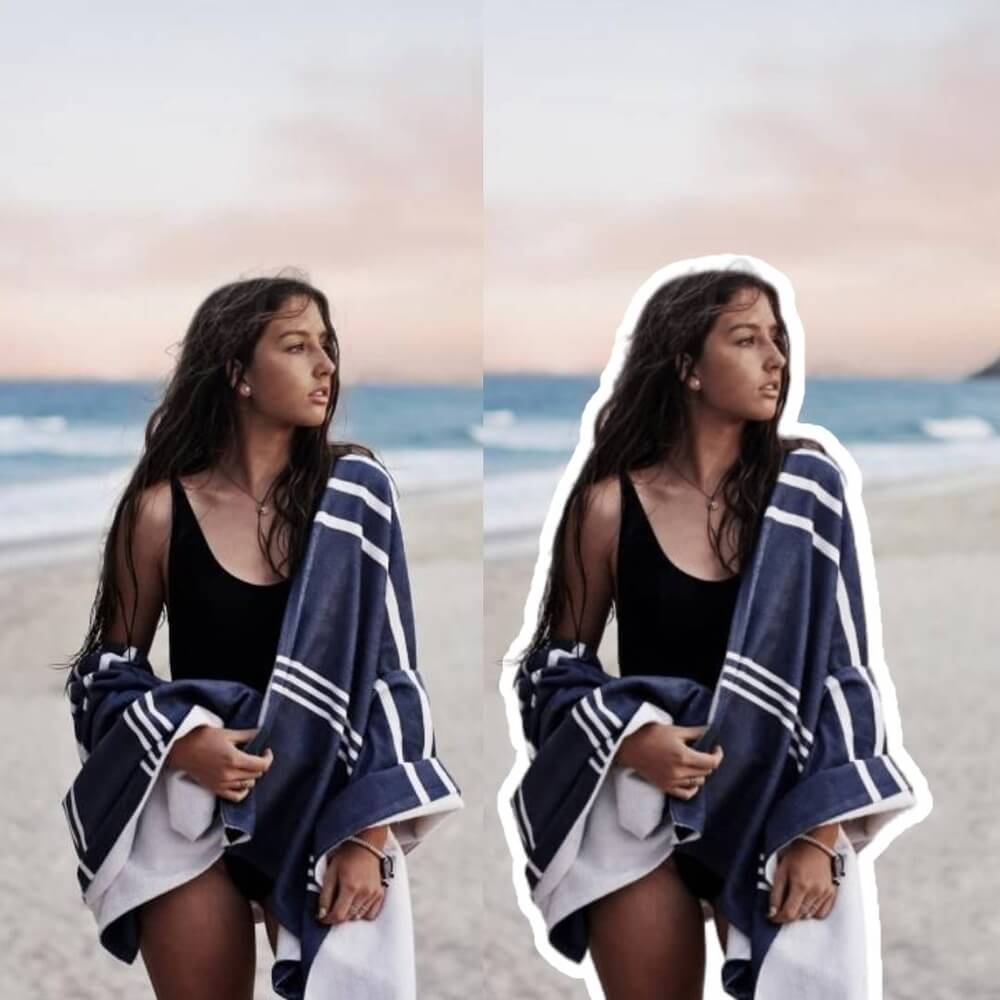
The Results
Final Thoughts
Outlining an image is a great way to draw attention to a particular subject or detail in an image. And YouTubers frequently use this technique to create their video thumbnails.
Well, now you’ve learned how to outline an image without Photoshop.
I hope you found this tutorial useful and have some fun playing around with your images to make them truly stand out.